- Homesteading
- Project Portfolio
- Building The Old Window Greenhouse
Building The Old Window Greenhouse
How It All Came Together
This is a project near to my heart. I've always wished for an old window greenhouse, and building this one was a dream come true.
Since we moved away from our little homestead in British Columbia, where everything was sold or given away at the end of our stay, I didn't dare dream I would ever have the chance at a long held dream; a greenhouse built from salvaged and vintage windows, cobbled together into one charming and appealing package.
Well, I'm glad to say that dreams do indeed come true. When we drove over 5000 kilometers across the country in a vintage motor home, we had no room for any of my carefully curated salvage.
None of my rusty metal, none of the bits and bobs that had come my way in recycle centers, thrift stores, from yard and garage sales or that Mike had picked up on his travels.
I was bereft, until I realized that here is the perfect opportunity to fill an empty bucket, hoard wise.
We parked at some friends place who were planning to declutter all their belongings, including - you guessed it - lots of salvaged windows! I glommed onto those, you bet. There were some that really caught my eye, including one long one with five smaller panes, and two with three panes - I pictured those surrounding a door.
Then there are some six pane windows, and also a lovely arched one. In addition, some very rustic smaller ones, without any paint on, and some without glass which I can see as part of a hutch - maybe in the greenhouse, maybe for my house.
So all these windows will make up the walls for my greenhouse. There is also a very cute door, narrow, with three horizontal windows, in an unusual configuration.
Here is a lot of fodder for my imagination.
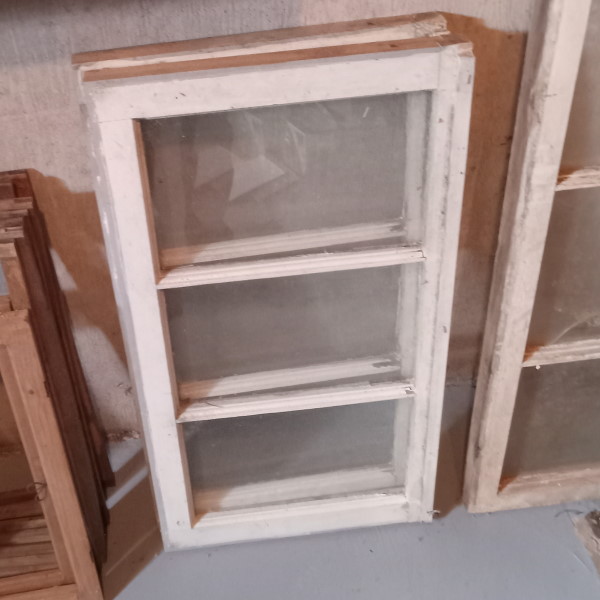 A selection of old windows, earmarked for the greenhouse project
In the spring and summer of 2024, this was felt to be the year for this project.
The first thing to do is decide on the location. A lean to design, off the side of the garage, facing west, was the perfect spot. Lots of southern exposure, yet protected from the east and its rough storms and strong winds.
It has easy access to electricity if I decide to go that route, and also the large roof of the garage to use for rainwater harvest. It's also not too far from the house, like my old greenhouse, so it won't be a major trek to get to it while carrying things.
The next thing to decide is the actual construction. It is to be wood framed, with some substantial timbers for uprights at the corners, and some 2x8 lumber laminated together to make a header.
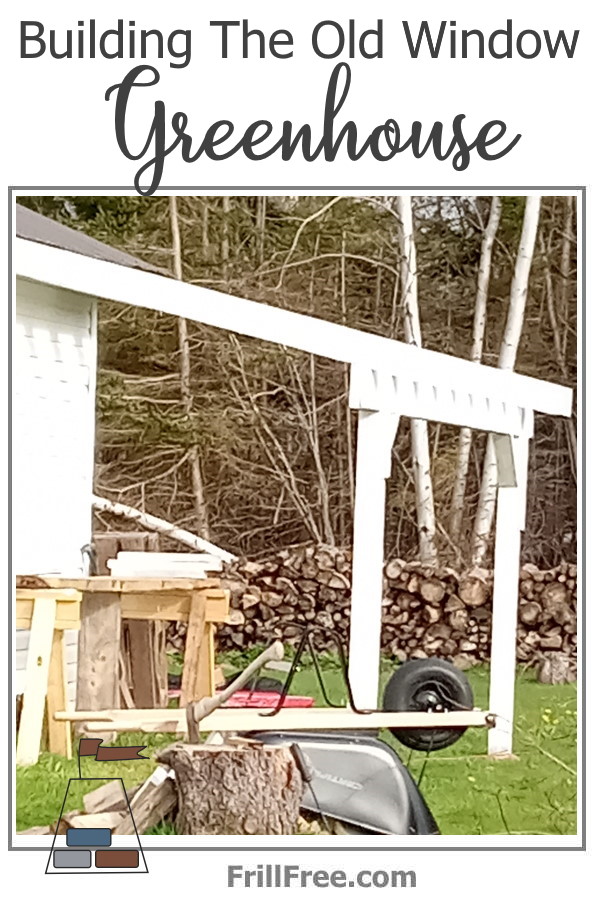
The two biggest uprights are 4x4 lumber, and will be concreted in to holes dug by a post hole digging machine, rented by a friend who offered to use it to dig them for us.
These are now in place, looking like a monument such as Stonehenge. That will change quickly once momentum reaches critical mass.
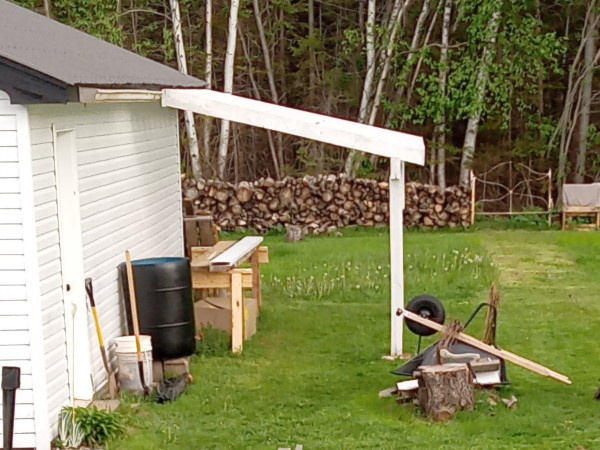 The rafters are in place, giving us the footprint
The rafters are 2x6 rough cut lumber (not planed) as they are from a local sawmill. Painted white to protect them and also reflect more light, they have a birds mouth to sit on the large beam made of 2x8's laminated together.
The blocking will hold the rafters upright and stable, even under adverse weather conditions (which are common here).
For roofing, we've settled on some kind of acrylic roofing material, which hopefully will withstand both the winds and also any hail storms we might get here. We had one episode where hail stones as big as ping pong balls shattered the roofing on our porch, so we don't want a repeat of that.
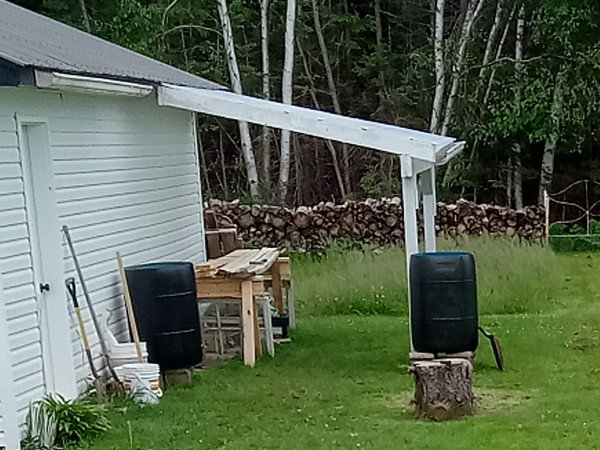 With the roof on, we can now harvest rainwater
We finally settled on the ripple acrylic sheets we could get from the hardware store; mainly for ease of installation, and also for cost. Five or six sheets, even factoring in delivery costs, comes in around the lower end of the budget. Do your own due diligence.
I really wanted to try a new product, a polycarbonate sheet that comes in rolls, but is flexible and strong, but the engineer on the job balked at trying something new, and so we went with a product that he has had experience with.
The decision on where to put the windows and then frame them up is the next big step. These will be 2x4 framing, and some smaller stock to hold the windows in place. Some will be opening, others securely fixed due to the high winds we can get here in the Harbour.
For the inside, the floor will be crushed limestone, tamped down with a long pole, and then some bricks installed on the walkway section. There will be a potting bench, with shelves for plants, decor items, and storage of pots and soil.
I will also insist on a potting bench or plant propagation station, however that looks. If I can't grow plants, life would be sere and grey. Those with a green thumb will understand!
Update, August 2024
Things have been slow to progress on the greenhouse, due to health reasons, lack of motivation, and some supplies needed. It also doesn't help that we have the added distraction of raising a puppy, to be my service dog in the future.
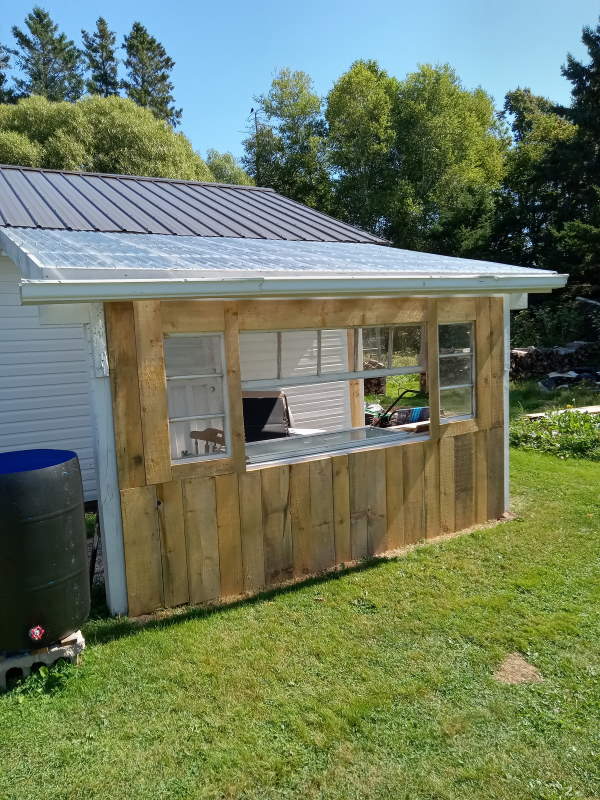 The exterior of the old window greenhouse, showing some of the windows framed in - progress is happening!
So for now we have in place two rain barrels for rainwater harvest, and the windows on the west side are being installed, very slowly. This is because each window is a different size, and occasionally a different thickness, meaning that all have to have custom made frames.
I have great hopes that by the fall it will be usable and we can see how she weathers the winter storms.
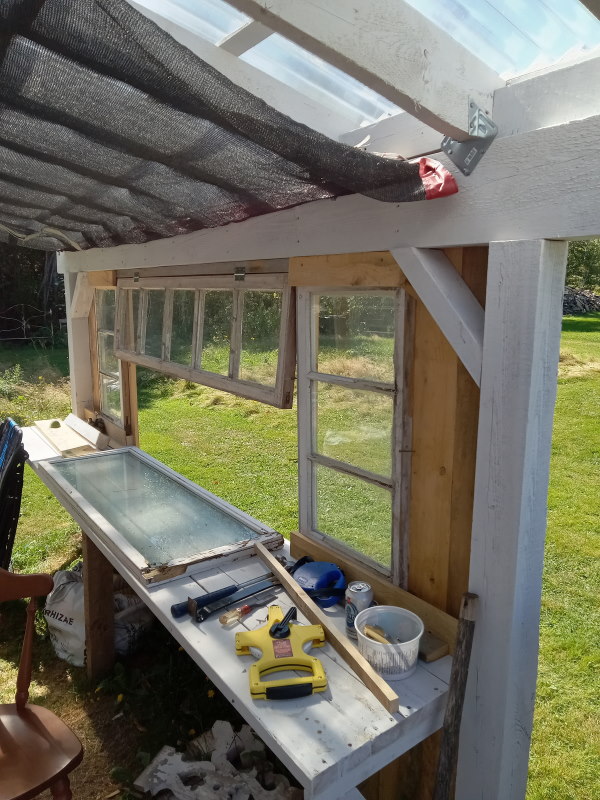 Here's what the old window greenhouse looks like in the inside - the black screen is the protective fence from a trampoline, folded in half for more shade.
Update, August 2025
I'm sorry to say there are no updates to report. There are no changes, except for the addition of a wooden chair for a seat during rainstorms, an epic experience when it pours in torrents.
Hopefully over the fall, it will reach some stage of completion. There is always something that takes precedence over this project!
