- Homesteading
- Composting
- Stacking Composting System
Stacking Composting System
Easy To Build Modules
I first came across this simple compost bin design in a Facebook group about composting, so decided to get my own Stacking Composting System up and running.
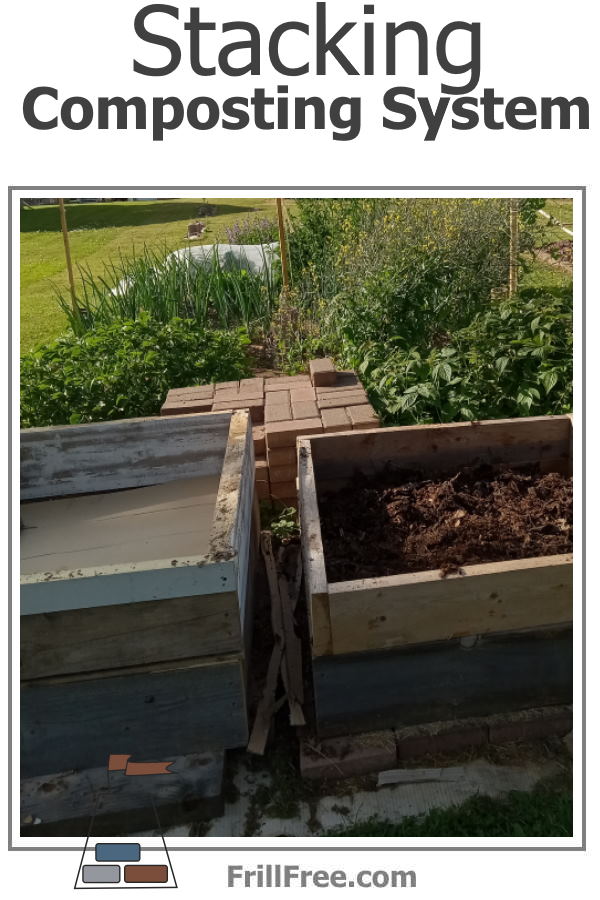
Luckily, Mike is handy with a skill saw and an impact driver, so he built the stacking modules from various dimension lumber. Each layer has to be the same, either 2x6 or 2x8, or they won't stack.
The pieces for our modules are four 36" pieces, which are then screwed to create a square. They are 'chased' which means that each side is the same, not rectangular, which would happen if you put the ends inside the front and back pieces.
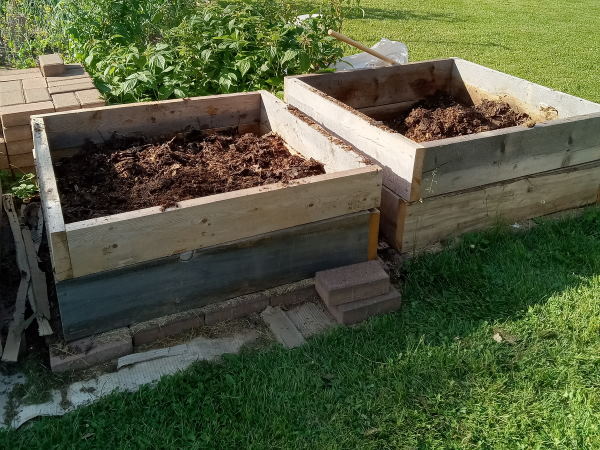 The stacking modules in process of moving from one to another
Then the fun begins. Starting with one module on the ground or on cardboard, begin your layering process. We had fall leaves raked and stored in bags for the winter, so we used those. A friend has chickens using a deep litter method, with pine shavings for bedding, so we got six or so bags of those.
Then the kitchen scraps were put into holes scraped into the mix of leaves and chicken litter.
Tea leaves, coffee grounds, potato peelings and all sorts of other scraps were collected in the house, then put into the bin. As the level got higher, more chicken litter, leaves, grass clippings and other organic materials were added, as well as another module or two.
Eventually, this bin was turned, but placing the top module next to the bin, and forking the compost into it, gradually moving all the modules over.
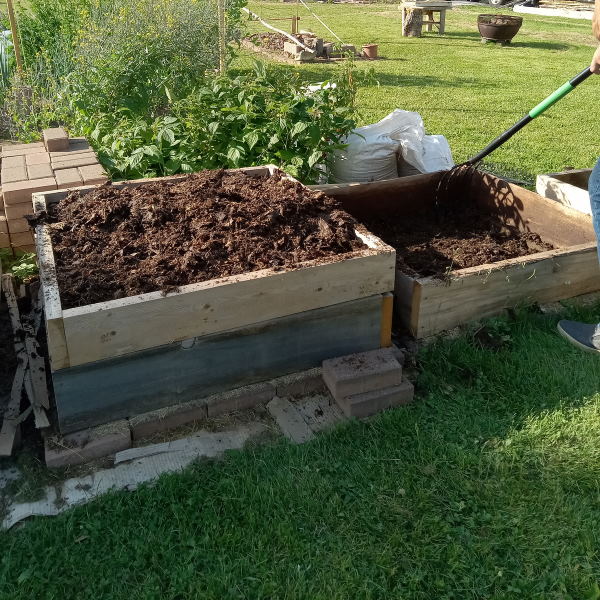 The second bin is full, now to add the third stacking module
You'll need 9 modules, at least, for this method to work. When one bin has three modules, then it's time to leave it to compost, with the aid of a little watering, covering with cardboard, scraps of plastic or old carpet.
After turning a couple of times more, the compost will be ready to use as mulch, to dig into your soil, or screen for seed planting.
I did go back and look at the original pictures, and in doing so, realized that they had cut two pieces shorter, so the eventual module was rectangular. I decided to stick with the 36" system, because then if you go high enough, you would end up with a cubic yard of compost.
